The origin of the word “cinematography” is the merger of two words in Ancient Greek—motion and writing. In this sense, the cinematographer is one who “writes in motion,” one who captures motion on screen. If the work of a production designer hews closely to the theater, the job of a cinematographer closely resembles painting, except what they paint moves across their canvas.

After Citizen Kane was finished, director Orson Welles felt that his cinematographer Gregg Toland was so crucial to the film’s success that he wanted to share his title card with him. Welles had to fight with the Director’s Guild since their rules stated that the director got their own title care, which came at the very end of the credits. Welles won that battle (with the Director’s Guild and his own ego) and right before Citizen Kane begins, the viewer sees both of their names, together.
Types of Camera Movement
You can break down camera movement into five basic categories: pan, tilt, track, crane, and zoom.
We can also think about whether a particular movement is motivated or unmotivated. Motivated camera movement occurs when some aspect of the narrative or the action on screen requires the camera to move: for example, tracking to follow a character as they walk away, panning over to see the source of a sound, etc. Camera movement could be described as unmotivated when the camera seems to move independent of the needs of the film or its narrative, often to have an emotional or intellectual effect: for example, the camera moving away from the action or zooming in on an object that may not seem important. Check out the following video that describes great moments of unmotivated camera movement:
https://www.youtube.com/watch?v=h2c3JZ6X3f8
Motivated camera movement seems more natural and is often somewhat invisible since the camera’s movements answer a need; a character moves, and we want to see where they go. Unmotivated camera movement can draw attention to the camera itself as a kind of narrator, making us notice the movement. For this reason, it is often avoided by many mainstream films that seek to immerse the viewer into an experience without calling attention to the art of the movie itself.
When writing Exam 1, you do not have to mention when you use motivated movement since the vast majority of camera movement is motivated. However, if you use unmotivated movement, be sure to mention it.
Anytime you move camera, make sure to tell me what kind of movement you are using (pan, tilt, tracking, push/pull, crane, reframing, zoom, etc.).
pan vs. tilt
The difference between a pan and a tilt is that with a pan, the camera rotates on a vertical axis. In other words, it pivots from left or right (or vice versa), like your head turning side to side. If it pivots all of the way around, it is called a 360 pan. If the camera operator pans so quickly that it blurs the image, it is referred to as a whip pan or swish pan. Here is a video with examples from P.T. Anderson’s films:
A tilt (or pedestal shot) rotates on a horizontal axis, as if the camera is “nodding” up or down. You have probably seen many tilts when a character approaches a building and the camera tilts up from the ground or when the camera tilts down from the sky to something on the ground. Example:
https://www.youtube.com/watch?v=p-Gv9pBBoK8
Here is a short video that explains the difference between a pan and a tilt:
http://www.lynda.com/Video-Filmmaking-tutorials/Pan-tilt/167570/182383-4.html
A tracking shot differs from a pan or tilt in that the camera moves freely instead of rotating on an axis. This type of movement is called a tracking or dolly shot since it was often created with the use of a dolly on a series of tracks (required to make the camera movement smooth). With the invention of the Steadicam (see below), tracking shots no longer needed the tracks. A tracking shot can move forward, backward, or laterally:
Some sources will make a distinction between a tracking and a trucking shot, with the latter referring to a lateral movement, but we do not have to do so in this class.
Students can run into a problem confusing the different camera movements, particularly pan vs. tracking. As you write Exam 1, you can help yourself differentiate between them by setting up your scene, blocking it on a kitchen table and using whatever is at hand to represent characters or objects. You can then hold something as your camera and work your way through the action of the scene. Doing so will help you recognize what camera movement you are using since you will see whether you are pivoting the camera (a pan) or moving it freely (a tracking shot). Plus, doing so will also help you think about camera placement, position, angle, height, and distance.
A push in and pull away are simply what they describe: a tracking shot either moving toward or away from a character/object. In most cases, the character/object is static while the camera pushes in or pulls away. A push in or pull away tends to be a smaller movement; movements that cover greater distance would be described as tracking shots.
Circular tracking can be confused with a 360 pan. A circular tracking shot is one that never leaves the subject but tracks around it in a circular motion; the subject forms the center of the circle while the camera (pointed inward) moves around it, looking at all sides of this character or object. A 360 pan requires the camera to stay in one place (pointing outward) but pivot a full 360 degrees, looking at everything surrounding the camera’s position.
As I said above, students often confuse pans and tracking shots. On Exam 1, if you find yourself writing that you are “panning around” something, stop and check what you are doing.
A following shot is simply a tracking/dolly shot that follows a character. It can do so from any perspective as long as the character is moving and the camera tracks to follow that character.
A crane movement (commonly called a crane shot) is one that involves movement that would not be possible without mechanical assistance such as a crane. The camera either begins at ground level and rises high above the action or vice-versa. Here is a short video that compiles a number of crane shots:
A common mistake is to confuse a crane shot with a high height or bird’s eye view. Always remember that a crane shot is a type of camera movement, not a camera position.
The last type of camera movement—a zoom—does not involve moving the camera. When the camera operator adjusts the focus, the camera seems to either move in or out due to the change in focal length while in reality the camera stays still. You can tell the difference between tracking and a zoom by looking at the sense of depth in the shot. Pushing in or pulling away will not change the focal length while zooming will do so. Here is a video on the difference between a zoom movement and a tracking shot. It also describes the dolly zoom as well (see below). The last couple of minutes are about how to adjust the camera and are not important for this class:
https://www.youtube.com/watch?v=AKOxbCx1LNc
A snap zoom (sometimes called a crash zoom) is simply a zoom done very quickly so that the camera seems to rush at the subject:
While the examples in the above clip are fast (given they are snap zooms), notice how the zoom changes what is in or out of focus (differentiating it from a tracking shot or a push/pull).
Steadicam vs. handheld
Tracking shots usually look smooth, given that the camera is set on tracks. With the invention of the Steadicam in the 1970s (a harness that keeps the camera from shaking through the use of a gyroscope) smooth tracking shots became available without the need for tracks. Handheld shots are when the camera is purposefully made to shake and bounce (to varying degrees, depending on the needs of the film).
Reframing is when the camera makes slight adjustments to keep a character in frame or in a certain position in frame as the character moves. These adjustments are so slight as to be almost unnoticeable; they are not meant to draw attention to themselves. Reframing may include any type of movement as long as it is minor in nature.
James Wong Howe broke many racial barriers in Hollywood. Of Chinese-American descent, Howe made a tremendous mark as a DP, working in Hollywood from the 30s to the 70s. Here is a fairly long clip from one of his greatest films, The Sweet Smell of Success. While you watch this clip, notice the careful use of shading and contrast, the way that Howe captures the lighting of an upscale New York club while using shadows to hint at the dark side of the conversation. Notice as well how Howe uses subtle camera movements to illustrate the power dynamic between the characters:
Lighting
The DP is in charge of the lighting crew, and lighting becomes a key part of any cinematographer’s art. The standard lighting set up used in the vast majority of filmmaking is called three point lighting since it involves three factors: a key light, various fill lights, and a back light. Here is a description and diagram of the basic set up:
https://www.mediacollege.com/lighting/three-point/
Your key light is your strongest light. This strong light will create shadows; the fill lights help lessen and control those shadows. The back light is set behind the figure being filmed. The back light will make the figure stand out from the background, creating a sense of depth. As noted in the link above, other lights may be included, such as lights on the background to help make it visible. While this set up usually only has one key light, it may also use multiple fill lights (see kickers and eyelights below). While it is called “three point lighting,” the three refers to three types of light rather than a strict number of actual lights. You may have underlighting or toplighting as part of this set up.
Kickers are small fill lights used to help balance out the key light. Eyelights are simply that—small lights aimed at the actor in order to accentuate their eyes; eyelights make the eyes “pop,” so to speak.
high key vs. low key
The three point lighting set up creates what is called high key lighting (in contrast to low key lighting). Importantly, the difference between the two is not a matter of brightness but contrast. The three point set up creates high key lighting, which allows for a carefully managed difference between light and dark. Due to the fill lights, high key lighting has low contrast; the difference between light and dark is subtle, with the light areas becoming gradually darker (or vice versa). Shadows are often transparent. DPs love high key/three point lighting since it generates a three dimensional look and grants them incredible flexibility in “sculpting” the image through light and contrast.
Gordon Willis, the DP on such as incredible films as The Godfather and All the President’s Men, was so adept at working with light and shadow that his nickname as “The Prince of Darkness.” One of the reasons DPs love to work with black and white is that his mode give them a great deal of control over shadows, but Willis found ways to have this same control in color. Here is a short film highlighting Willis’ work on The Godfather with great insight in terms of how the cinematography expresses character and character development:
Here is a video that explains the difference between high and low key lighting. Don’t worry about any of the terminology he uses other than key light, fills, and contrast (with emphasis on the idea of contrast):
Chiaroscuro is extreme low key lighting with strong contrast between light and dark. With all of the fill lights removed, the difference between the key light and what it cannot reach is stark. The shadows will be inky, and the line between light and dark will be sharply defined with absolutely no gray area.
Look at the following frames and determine if they are high or low key lighting. Of course, it is important to see that an individual lighting set up may be somewhere in between these two options. It is good to think of high and low key as poles on a spectrum rather than mutually exclusive. Try to identify the location of the key light.


Remember that the difference between high and low key lighting is contrast, not brightness.
A way to remember that the difference is contrast, not brightness, is to think about a typical shot in a Western. The character, wearing a cowboy hat, stands in the bright sunshine, the brim of his hat shading his eyes. While this is a brightly lit scene, without fill lights to balance out the key light (the sun or its substitute), we will create a low key effect; the character’s eyes will be hidden in opaque shadow. Conversely, you can imagine a scene shot at night, with more dim lighting, but still with a three point set up. In this instance, there may be many shadows, but they will be largely transparent.
In writing Exam 1, discuss the lighting set up in detail. First, decide if you are going for high key or low key lighting or if you will switch from one to the other. Once you make those choices, you can think about the placement of the lights. Doing do will give the opportunity to use a number of important terms such as key light, fill lights, etc. It is a good idea to avoid using only natural light in Exam 1 since it keeps you from using an entire array of terms.
For Question 2, remember that the German Expressionists loved low key lighting for its dramatic effects.
A highlight occurs when the lighting creates a bright spot on an object or actor.
A highlight occurs when the lighting creates a bright spot on an object or actor.
A flare is when the light overwhelms the camera to create a streak of light. J.J. Abrams gets a lot of grief for overusing flares. Here’s a compilation of flares from his films:
Hard lighting is unfiltered, direct light, which tends to create harder, more defined, and darker shadows. Soft lighting is light diffused in some way, perhaps through a filter or bounced off of another surface; it creates softer, less defined, and more translucent shadows. For a more common example, think about the light that comes from a lamp with a shade (which is more soft and diffused) vs. a bare bulb (which is hard and direct). There are various ways to create diffused/soft lighting. If you are interested, here is a website that breaks down the various means (paper, “softboxes,” umbrellas, etc.), but for this class, you do not need to know the difference between these:
https://www.premiumbeat.com/blog/cinematography-tip-how-to-create-soft-diffused-light/
If the back light is strong enough, edge or rim lighting will occur; the strong back light will create a glow around the edges of the object or person.
Set lighting are light sources that originate from the set itself (a lamp on a desk or streetlights, for example). In most cases, set lighting is not the main source of illumination.
natural light (and the problem of natural light)
At times, DPs may use natural light as a source of illumination, even as the key light. This is rare since natural light cannot be trusted (due to weather conditions) and cannot be as easily manipulated. Plus, shoots for a scene can run for a long time, days even, and the sun constantly changes position. While natural light is used at times, the “sun” in an outdoor scene may be an artificial light.
The Lens and Depth of Field
The key issue here is focal length. Focal length can be complex, but for the purposes of this class, we will focus on three different focal lengths and the type of lens associated with each: short (wide-angle), middle (normal), and long (telephoto). Each type has an effect on how the viewer will perceive distance in the shot.
To explain the difference between the three types, let’s use one example: a shot of a woman standing in front of a car, with a building in the background behind the car. As we discussed in the mise-en-scène section of the class, this shot has three distinct planes.
A short focal length (associated with a wide angle lens) exaggerates distance. If you film this shot with a short focal length, the distance between the woman, the car, and the building will seem farther apart than it actually is. A short focal length “pulls apart” the planes.
A middle focal length will reproduce the planes and the distance between them accurately.
A long focal length (associated with a telephoto lens) will deemphasize the distance. If you film this shot with a long focal length, the distance between the woman, the car, and the building will seem less than it actually is. A long focal length “squishes” the planes together and makes the shot look flat.
Here is a video that illustrates the difference between short, middle, and long lenses in terms of perspective and depth of field. You do not need to worry about the technical aspects discussed here:
Selective focus means that at least one of the planes in the shot is out of focus and is extremely common in filmmaking. DPs use selective focus to manipulate the viewer’s attention, putting certain visual information in or out of focus. In each of the four following frames, a different plane is in selective focus (back, middle, near the front, front):


Deep focus means that every single plane of the shot is in sharp focus. Of course, this may not matter if the shot is shallow, with only one or two planes, or if the background is a special effect. Deep focus becomes important and impressive when the shot has deep composition and multiple planes. In order to create deep focus, the DP must use a short focal length and light the set carefully to keep everything in focus.
Here is one of the great examples of deep focus cinematography from Citizen Kane. The DP on Citizen Kane, Gregg Toland revolutionized the use of deep focus with this film. Notice how, through the use of deep focus, Welles and Toland keep your attention on all of the people involved in the drama that plays out: a mother giving up her son to be raised by a banker to keep him away from her abusive husband (please note that the lesser quality of the clip detracts somewhat from the deep focus effect; with a good print, you will see that every plane is in sharp focus):
Andre Bazin—one of the most influential film theorists and scholars, who began writing film criticism in the 1940s—promoted the idea of what he called “pure cinema,” which he defined as the combination of deep focus and the long take (see below). Bazin felt that editing was manipulative; in a scene like the one above from Citizen Kane, the viewer is allowed to choose what to look at, what is important, rather than being guided by editing.
Racking/pulling focus occurs when the DP shifts the focus from one plane to another. One plane goes out of focus while another plane comes into focus. Here’s an video that goes through the way that filmmakers use a rack focus:
The dolly zoom or vertigo effect (named so since it was used to such memorable effect in Hitchock’s Vertigo) is created when the camera tracks back away from the subject while the camera simultaneously zooms in. The zooming in creates the illusion of moving forward while the camera is actually moving backward. The reverse (zooming out while tracking in) is possible as well. Here’s a video that breaks down the effect:
On Exam 1, make sure you discuss focal length in detail, deciding if you are using a long, medium, or short focal length. You can also switch between these settings. Whatever you choose, make sure you clarify why you are making that particular choice, including what this choice does to the planes within the shot and the sense of depth within the image. I would suggest avoiding using only a medium focal length in your answer since it does not give you a lot to discuss. Remember that deep focus requires a short focal length.
Special Effects
We can divide special effects into three categories: practical/mechanical, optical, and computer generated (CGI). Practical effects are those that involve the use of physical objects, ranging from something as simple as smoke machines to something as complex as the animatronic models in Jurassic Park (which were created by Rick Baker—see the box concerning him in the mise-en-scène list. Optical effects are when filmmakers use the camera to create effects such as superimpositions or process shots (see the discussion below). CGI includes morphing, the creation of digital environments, etc.
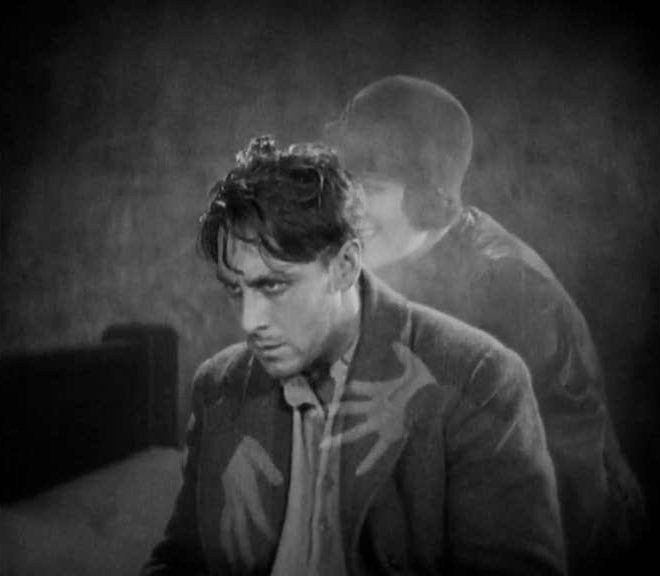
Superimposition (sometimes called double-exposure) is a basic special effect, both in its simplicity and its usefulness. Superimposition involves filming one image and then filming a second (or third, or fourth, etc.) image on top of each other.
Here is an example from Murnau’s Sunrise. In this moment, the character shown is in turmoil, trying to decide if he should go through with a plan (hatched by his lover) to murder his wife. Murnau superimposes the image of the lover to symbolize temptation and inner conflict.

Process shot is a broad category that covers anytime two shots are combined to create a special effect, although in more complex ways that a simple superimposition. Process shots would include rear and front projection, matte work, and green-screening (see below).
Rear projection involves projecting an image onto a translucent screen. Actors or objects are then filmed on the other side of the screen, standing in front of the image (thus “rear” projection since the image is projected onto the screen from behind).
A definition of rear projection from Columbia Film Glossary with a good explanatory video:
https://filmglossary.ccnmtl.columbia.edu/term/rear-projection/
Front projection is more complex and was largely developed for use in Kubrick’s 2001. Rear projection looks flat, with a noticeable disjuncture between the screen and what is filmed in front of it. Instead of projecting from the rear/behind the screen, front projection bounces the image off of a two-way mirror and onto the screen. The camera then films through the translucent part of the two-way mirror. This creates a more convincing effect with a greater sense of depth.
Matte work is the act of placing two separate pieces of footage together, as if the two parts are part of a jigsaw puzzle. For example, in the clip concerning rear projection, the footage of street is “matted” into the space of the back window of the (fake) car. Filmmakers would often use miniature landscapes, which were then matted into the action of the film to form a backdrop. In the past, it was common to use a glass matte (a painting of a landscape or background on a glass plate) and then superimpose the additional footage in a space left blank. Here is an example from one of the Star Wars movies. Notice the black space left in the painting (the smaller image on the left) vs. the final image with the filmed footage added (the smaller image on the right):

The problem here is that the character cannot move into the matte itself. This requires a traveling matte. A traveling matte means that a space is cut into the matte; the space has to be the exact shape of the character so that the character and the matte can be “jigsawed” together. You can imagine that this was an arduous process since the character and the matte have to “jigsawed” over and over, frame by frame, for the character to move into that space. If it is not done perfectly, you get what are called “matte lines,” glowing lines around the character or object. In the early Star Wars films (before they were digitally remastered), you could see these matte lines at times.
Green- or blue-screening makes creating process shots (especially traveling mattes) much less difficult. Using a special camera that does not pick up the specified color (green or blue), a character or object is filmed in front of a green or blue screen, creating the blank space. Other footage is then matted onto the image. CGI, combined with green-screening, has rendered the use of glass mattes and miniatures obsolete, although many people still prize the artistry that goes into creating these effects.
The special effect team on The Mandalorian introduced an incredible innovation that allows filming to take place in 360 degree artificial environments by using video game engines and a room completely outfitted with screens. A problem with green screening and prior CGI was getting the lighting right, matching the physical set with the CGI. This effect is superior since the light from the LED screens acts as an actual light source; you do not have to match it since you are filming the actors, the physical set, and the CGI environment at the same time. Plus, after the cost of the room, it is relatively inexpensive. Here is a video about the process:
Willis O’Brien was an early master of stop motion animation; he was responsible for creating and animating the classic King Kong (1933). Ray Harryhausen studied under O’Brien and went on to win an Oscar for Lifetime Achievement. Harryhausen specialized in combining life action with stop motion, as seen in the following clip from Jason and the Argonauts:
As you watch this clip, appreciate how seamlessly Harryhausen combines miniature sets with actual locations and miniature models with human actors without the use of any computer technology. The actual skeleton models used to create this scene are only 5 or 6 inches tall.
stop motion animation
Another special effect that has largely been replaced by digital means is stop motion animation, although it is still widely respected and enjoyed as an art form. Stop motion animation requires a filmmaker to use models (made out of clay, plasticine, etc.) as their actors. They place these models on miniature sets and then animate them in a pain-staking process. Each model must be moved in extremely small, incremental ways; after each movement, the camera advances just one or two frames (usually for an average of 12 to 24 frame per second) in order to make the movement smooth. Example of recent stop motion animated films would include Nightmare Before Christmas, Coraline, and Paranorman.
motion capture suits
Motion capture suits are made up of an array of sensors, which are then placed over an actor’s body and face. As the actor performs, the sensors record the performance and then convert that data into a computer animated figure. It was this technology that was used to create Gollum in Lord of the Rings and Caesar in the recent Planet of the Apes movies. Andy Serkis (who played both Gollum and Caesar) and Doug Jones (Pan’s Labyrinth) are considered masters of this type of work.
While one of the scenes you can pick from for Exam 1 has a clear use for special effects, you can find ways to include these terms in any of the choices. Think about simple practical effects or using optical effects to create the illusion of a location. In addition, superimposition would work well in the second question since it was a favorite tool of both German Expressionist and (especially) French Impressionist filmmakers.
Other Terms
Film stock refers to the nature of the film used within the camera. While digital cameras are taking over, some filmmakers still prefer using the older models. Fast film stock is more sensitive to light, produces a higher contrast, and can have a grainy appearance. Slow film stock is less sensitive to light, produces a lower contrast, and creates sharper images.
tinting, toning, hand coloring
In the days before color processes were developed, black and white film could be given color in several different ways. Tinting or toning entailed dipping the film stock into a dye bath (either before or after it was developed). Toning colors the darker areas; tinting colors the lighter ones. Only one color could be created. Hand coloring involves the laborious process of stenciling or painting the film one frame at a time.
You may have noticed that all of the DPs I have mentioned are men. Unfortunately, cinematography has remained an almost completely male-dominated field for most of Hollywood history. However, in the past decade, women have started to break this barrier, with DPs such as Ellen Kuras (Eternal Sunshine of the Spotless Mind) and Maryse Alberti (Creed) producing amazing work. Rachel Morrison (Black Panther) became the first woman to receive an Academy Award nomination for her work as DP on Mudbound in 2017.
black and white vs. color
While the introduction of full color processes marked a huge advance in film art, it is important to remember that black and white film has its advantages, particularly in the ways in which black and white allow the DP to shape and sculpt light. Some filmmakers still want to use black and white for this reason.
Ramping refers to the various means of speeding up or slowing down the rate of the film, thus creating fast motion (ramping up) or slow motion (ramping down).
Reverse motion is running the film backwards, reversing the motion. Check out this video in which choreographer and filmmaker Brian Brooks films dancers in a combination of slow motion and reverse motion for a very cool effect:
Freeze frames are when filmmakers repeat a single frame so that the image becomes completely static for a period of time, like a still photo.
Masks are different from filters in that masks block or blot out part of the frame. For example, filmmakers may put a mask over the lens so that only a circle is visible. An iris is a mask that can open or close.
Split-screen imagery is when the filmmakers “cut” the frame into pieces in order to show different points of action at the same time. Here’s an example from Pillow Talk (1959). Director Michael Gordon couldn’t show his two stars taking a bath together due to censorship at the time, so Gordon uses a split screen to titillate the audience:
The long take is just that—a long take of the camera, without any editing. What defines “long”? Most sources simply say “longer than usual” and do not give an exact number. Here is a discussion from the Columbia Film Glossary: https://filmglossary.ccnmtl.columbia.edu/term/long-take/
Here is a very interesting video essay on the use of steadicam tracking shots in the works of P.T. Anderson. Most of the shots examined are also long takes: https://vimeo.com/56335284
Here is an example of a celebrated long take from Scorcese’s Goodfellas:
Here is one another revered long take from Orson Welles’ Touch of Evil. It took Welles and his team an entire night to get this shot–as you watch it, imagine the logistic nightmare of getting this shot just right:
For Exam 1, you will write your answers as if you are filming a long take. You will not edit at any point; your answer will be one take, without interruption. A good way to test to make sure you are using a long take it is to set up your scene on a table as previously mentioned. Read your answer and move the camera as you describe. If you find yourself jumping to a new location, without specifying a camera movement that got you to that new location, you may be editing.
While your answers will be in the form of a long take, this does not mean that you have to constantly move the camera. You should have many moments in which the camera is resting, simply taking in the action. These moments are perfect for discussing focal length or composition.
The one exception to this rule is if you decide to use a split screen. In that case, you can edit in another frame to create the split screen and then edit away from it, or you can have a second image “wipe in” to create the split screen imagery and the “wipe out” to leave.
Aspect ratio refers to the shape of the screen, the relationship between its width and its height. Up to the 1950s, the standard aspect ratio for many years in Hollywood was 1.33:1 or 4:3, which was called the Academy ratio (see the example in red below). In the 1950s, in order to compete with television, Hollywood began using increasingly wider aspect ratios (at that time, television sets used the Academy ratio). These aspect ratios went as wide as 2.35:1 (with Cinemascope prints) or 2.77:1 (with Cinerama prints). Here is a video essay on aspect ratio:
In the image below, you can see the different aspect ratios in relation to each other.

For Exam 1, think about your aspect ratio. Widescreen ratios can create sweeping vistas and imposing compositions. A squarer aspect ratio can help produce a more intimate feeling or generate claustrophobia. Spielberg tends toward wider aspect ratios while Cronenburg gravitates toward a tighter sense of space. In Grand Budapest Hotel, Wes Anderson uses three different aspect ratios, each paired with a different time period in the film’s narrative:
